
Contacts
The CONTACTS module helps you manage all your contacts at a click. It enables you to access any information of any contact within seconds.Here you can create or delete any contact, view their information and edit them if you have enough privileges.
Import many contacts into Easycloudbooks at once, saving you time when you're setting up your practice. You can import Contacts using a template XLS file, or XLXS file. If you already have contacts in Easycloudbooks, you can import more. Know More
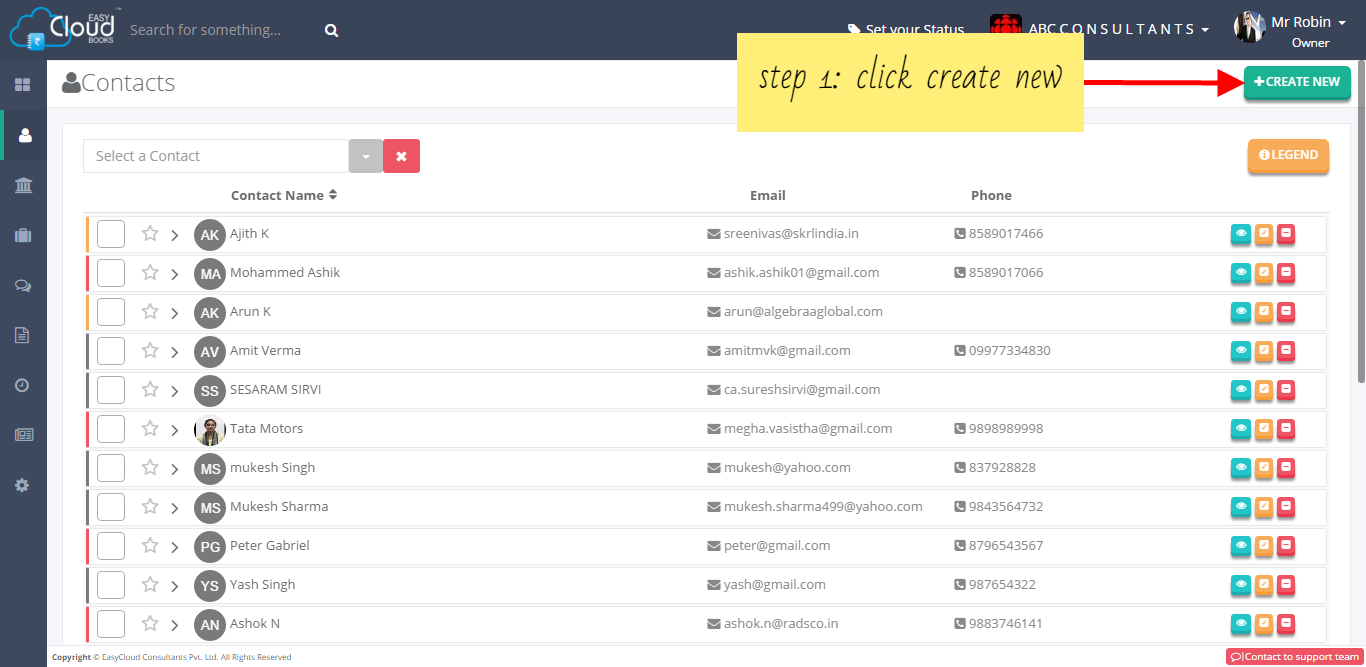
Step 1: To create a new contact, click on the Create New button on the contact page. It will redirect you to a new page.
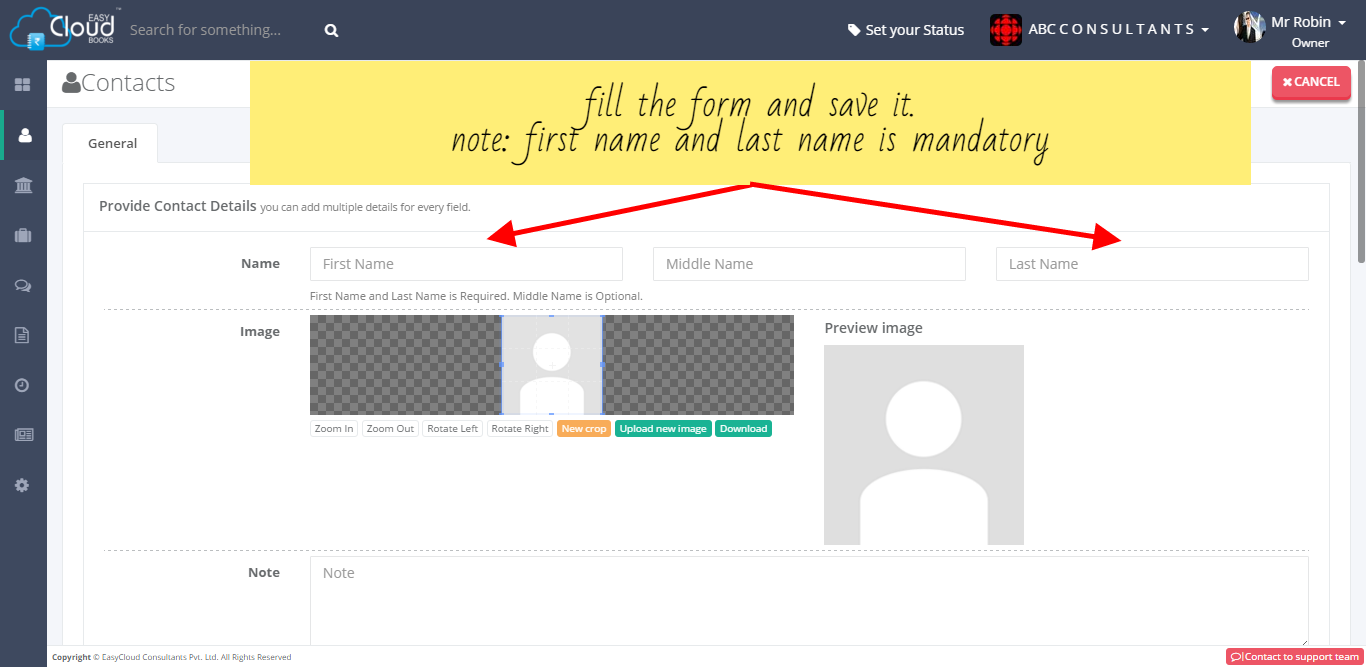
Step 2:On this page, you need to fill up some information of the contact to be created. It covers all the essential details about the particular contact.
Click on SAVE CHANGES button and it will be displayed in the Contact List on the first page.
Note: first name and last name is must.
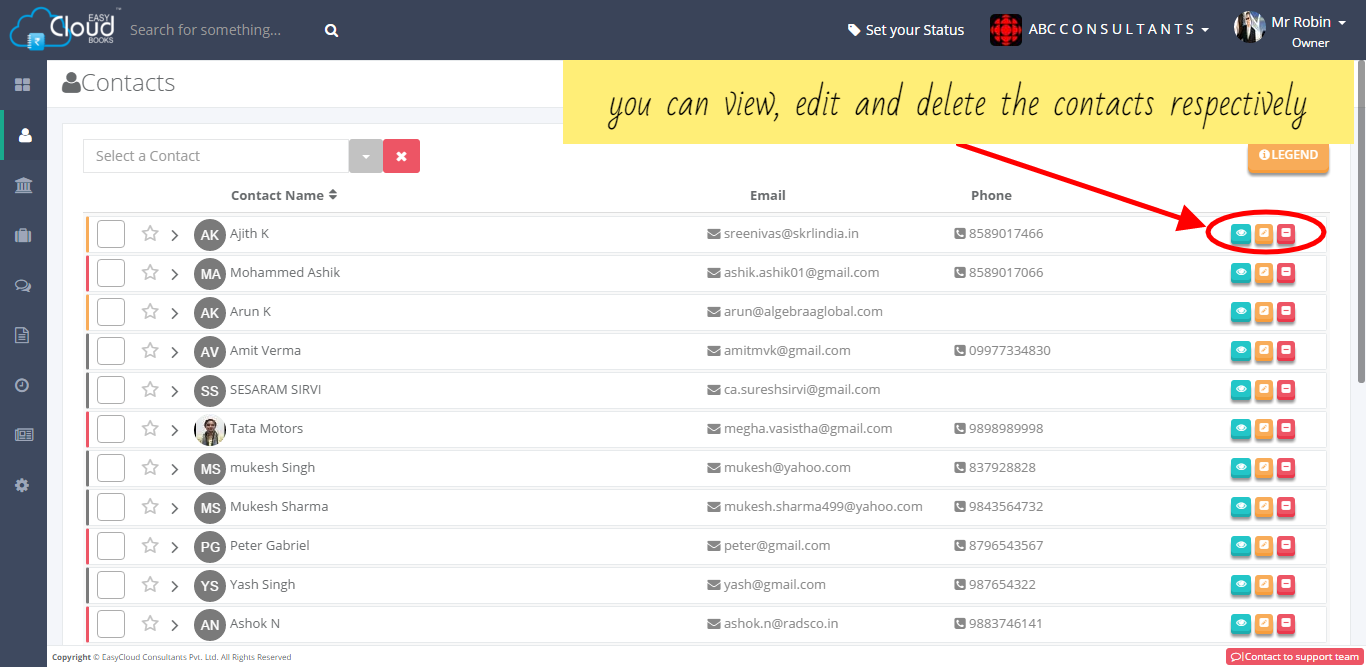
As shown in the picture, you can view, edit or delete a particular contact by clicking on the buttons provided on the right.
Blue button - to view contact details
Orange button - to edit contact details
Red button - to delete the contact

Legend simplifies the process of managing contacts, by highlighting its important aspects. It is a small line, of different colours, in front of the contact name.
Each colour symbolize some special information about the particular contact.
Red - This colour draws your attention towards some important issues, like projects on hold, balance pending,if any of that contact.
Orange - It indicates that some essential information is missing, i.e., all the details of that contact are not properly filled.
Blue - Blue colour signifies success about all the required projects. It displays project completion and billing status.
Green - This colour shows all the pending projects of the particular contact.
Black
- Black colour ensures all the tasks, of that contact, have been dealt with.
By clicking on the arrow (image) in front of the contact name, you can see some basic details of that contact like his address, companies he is related with etc. However full detailed information can be obtained through mouse over. A small window is displayed showing all the essential details such as companies- that contact is associated with, number of his ongoing and pending projects, balance amount etc.
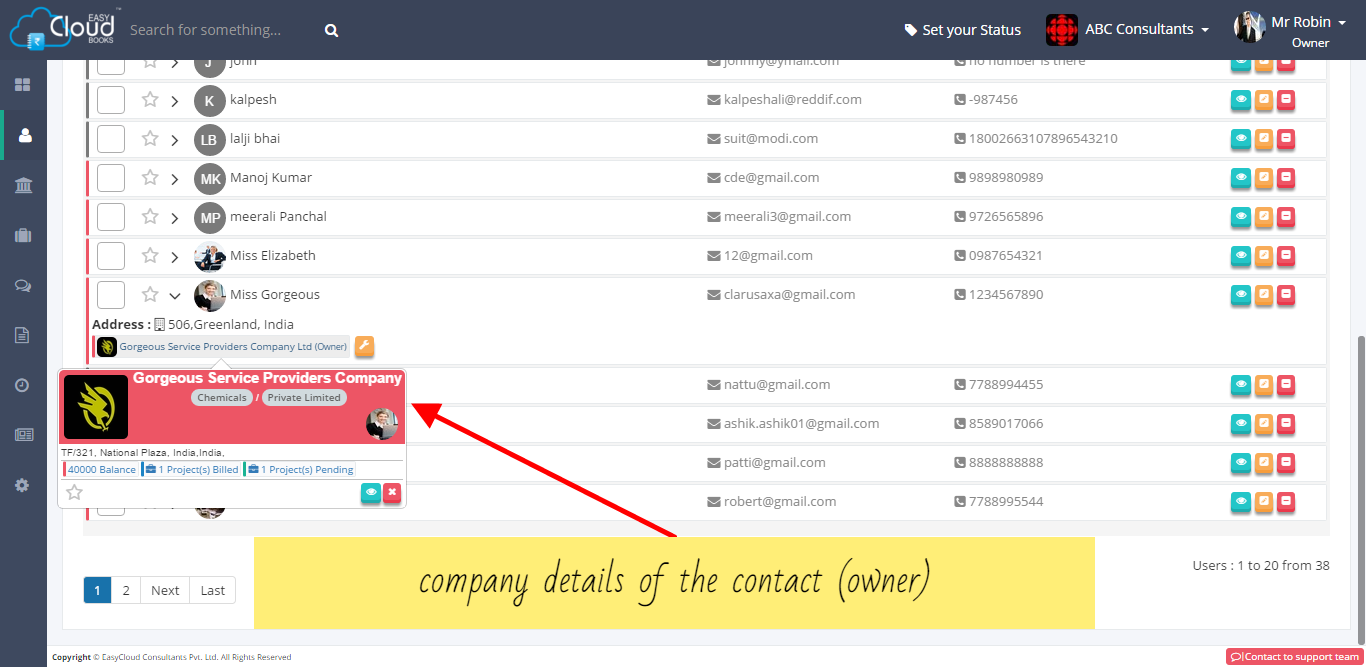
Further if you want to know his company-wise details, you will have to click on the small box, infront of the company's name. As show in picture, you can view company's short information by Mouse over on the company name of the contact. For example company's address, balance and project's information can be seen here. You can also view the same company by clicking Blue view button.
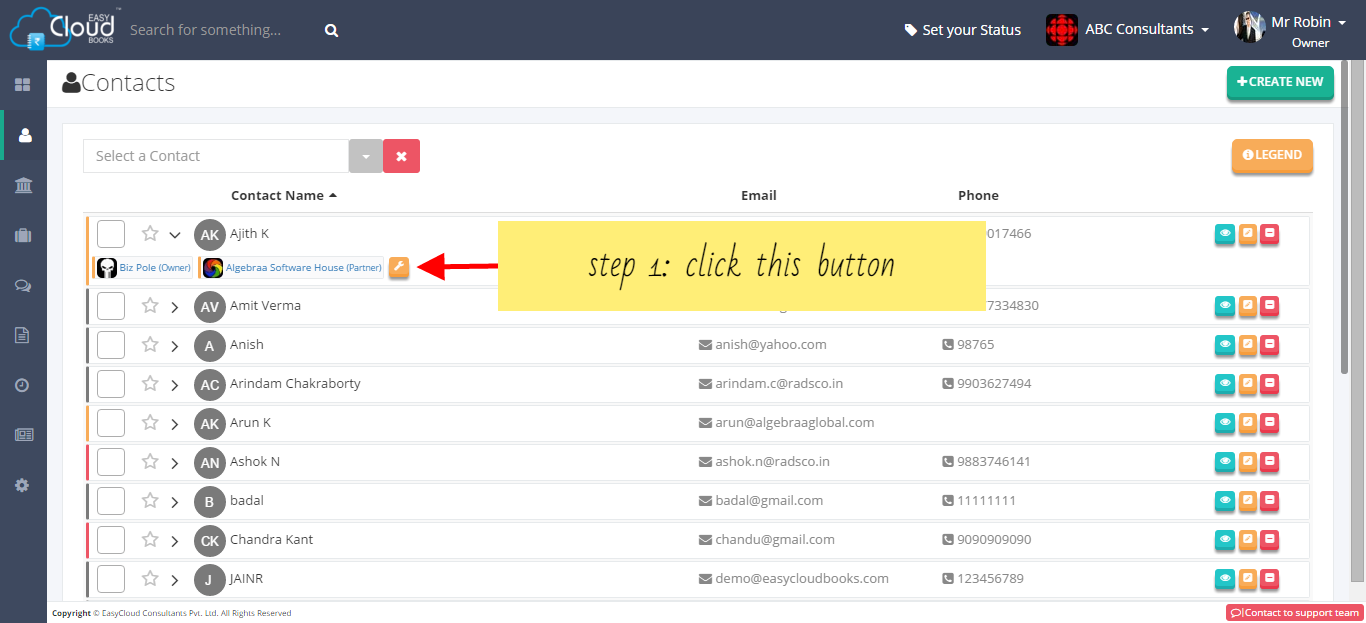
step 1: When you click on the arrow in front of the contact name, a small Orange button appears ,next to his company's name. Clicking on this Orange button, will redirect you to contact's company page.
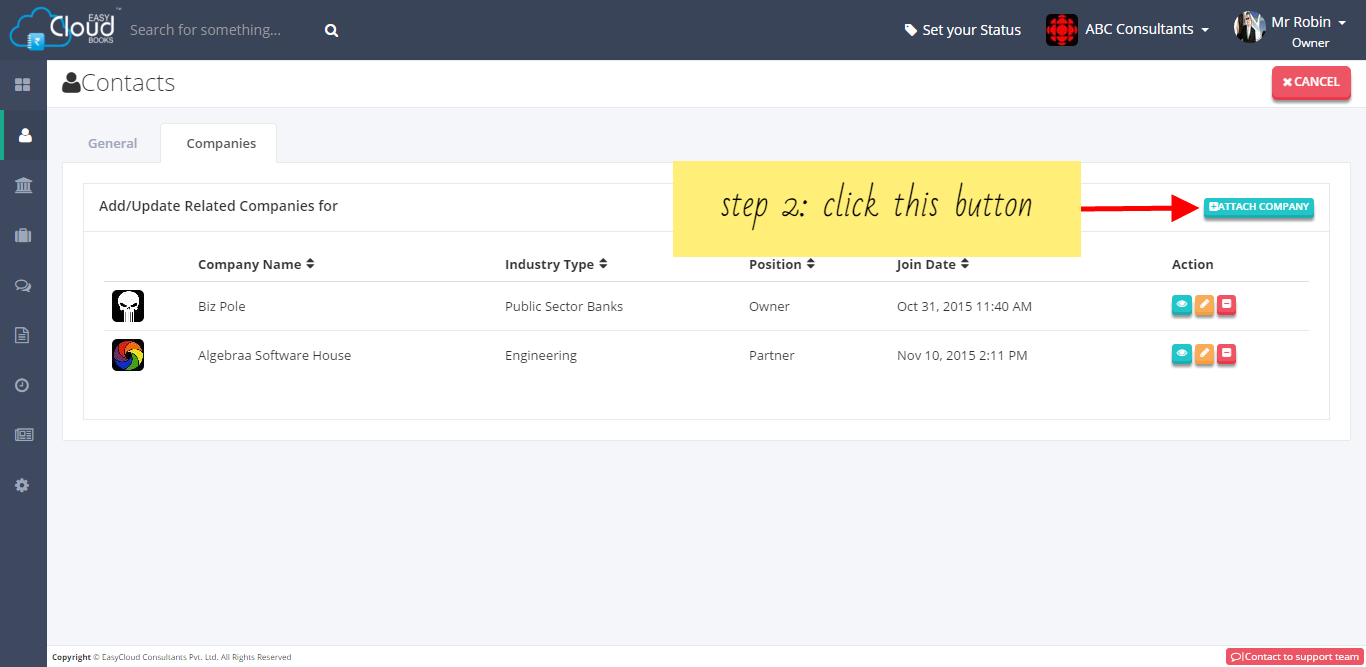
step 2:Here you will find a blue button, named ATTACH CONTACT. On clicking this button, you will get a pop-up screen, having two different options:
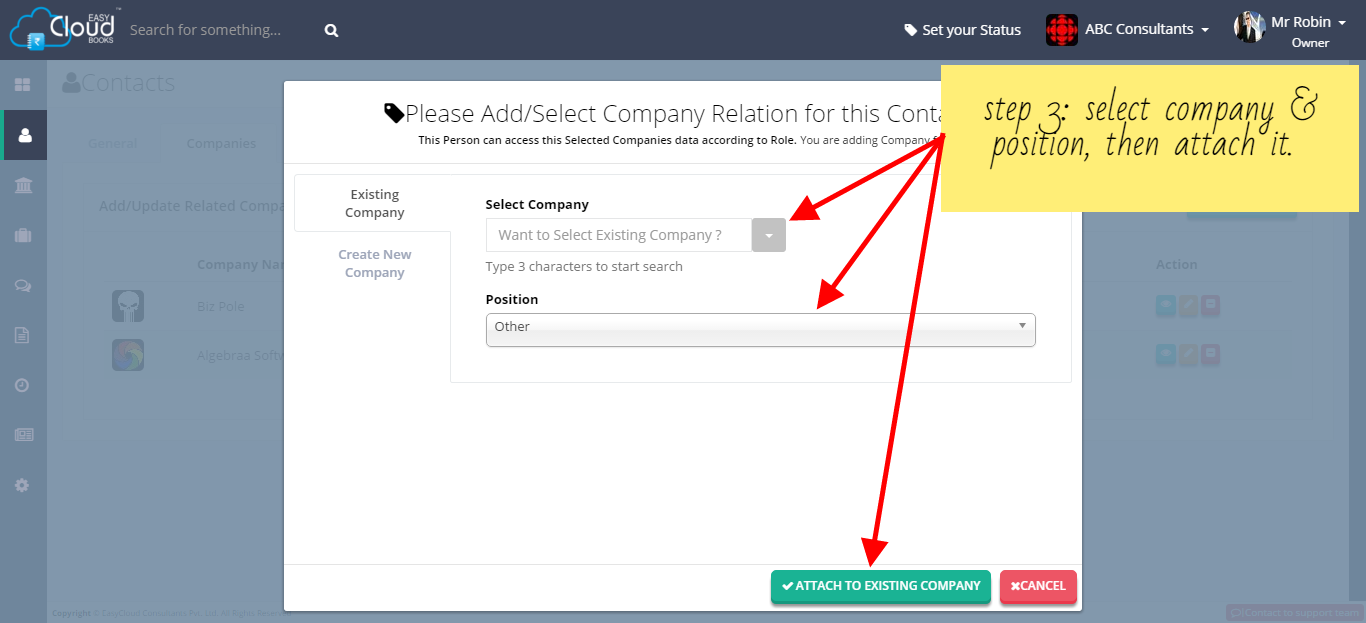
step 3:
Existing Company - Just by typing initials, a dropdown list will display all the existing companies of that name.
Create New Company - If you want to attach that contact to a new company, enter details of it.
Both these options will ask for the position of that contact in the particular company. Assign position and click on ATTACH COMPANY button.
Easycloudbooks enables you to add as many companies, to a single contact, as you want. The process to add multiple companies is same as mentioned in above question.
The contact list can be sorted in ascending or descending order either through contact name or through email Id, just by clicking on that field.
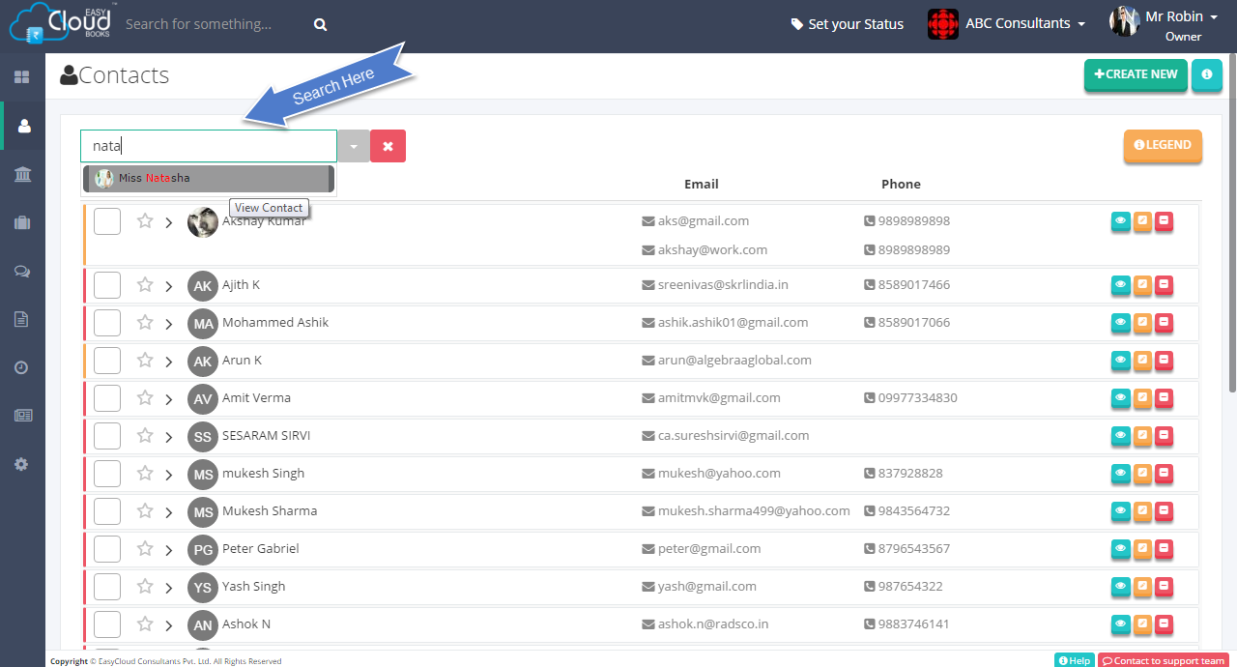
Yes, you can easily search for any contact using the FILTER button, above the contact list . You just enter a few initials of the contact, you are looking for, and the drop down list will display your required contact.
This module enables a Centralised Contact Management System. All your contacts are managed through a central hub which can be accessed only by those whom you have authorised. Contacts can be viewed, created or modified only by authorised persons ; however owner gets full access to it.
This module has some upcoming features such as :
Summary View : To elaborate details of business with a particular contact.
It will help you to know how important that client is for your firm.
Ratings : By YOU for a Client, By Client for YOU.
Possible Opportunities : To track all the possible business opportunities related to a particular contact.
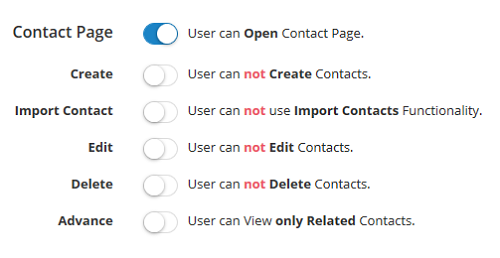
You can stop access or you can give limited access or full access to users on contact page.
To Stop Access - Turn off Contact Page
To give access to only those contacts on whose projects user is working - keep advance button off.

To give access to all contacts - Turn on advance button. Note :- You can control Create, Edit, Delete, Import from excel properties with turn on/ turn off button.
When advance button is OFF, user will be able to view only those contacts of companies on which user is working on projects. When advance button is turned ON, user will be able to see all contacts.
Set up Contact Tag in Easycloudbooks to more easily manage contacts which have something in common. You might want to group/tag contacts by ownership, industry, location or some other factor that works for your practice.
Yes, you can tag contacts and you can change multiple tag also.Please watch this video to know more about Conatct Tag.
This video helps you to use Custom Filter in Contacts on EASYCLOUDBOOKS.