
Projects
The projects module enables you to view and direct all your firm’s projects at a click. It helps you set a direction for your workflow by categorizing the projects as per their status, such as pending, lead, not started, in progress, on hold, completed, billed, collected, etc.It simplifies the process of managing projects as you get full detailed description of any project along with its date of creation and completion, project manager, billing amount, percentage of completion etc.
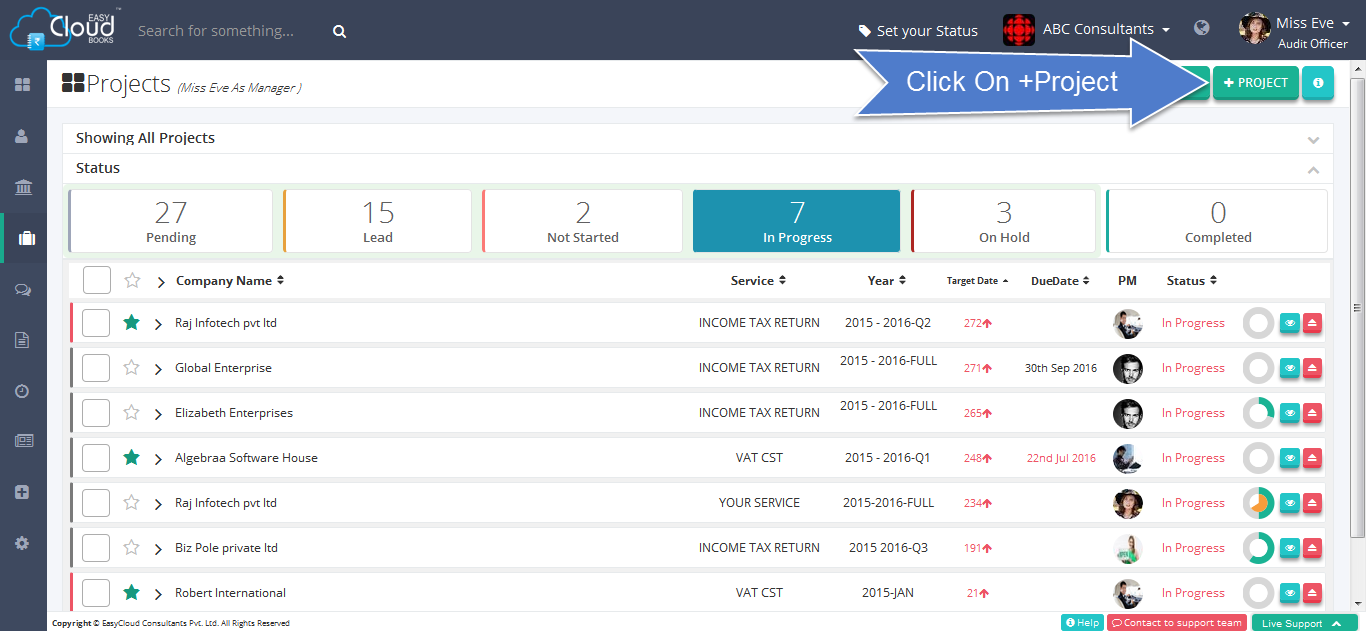
step 1: To create new project, click on + PROJECT button in the project module.
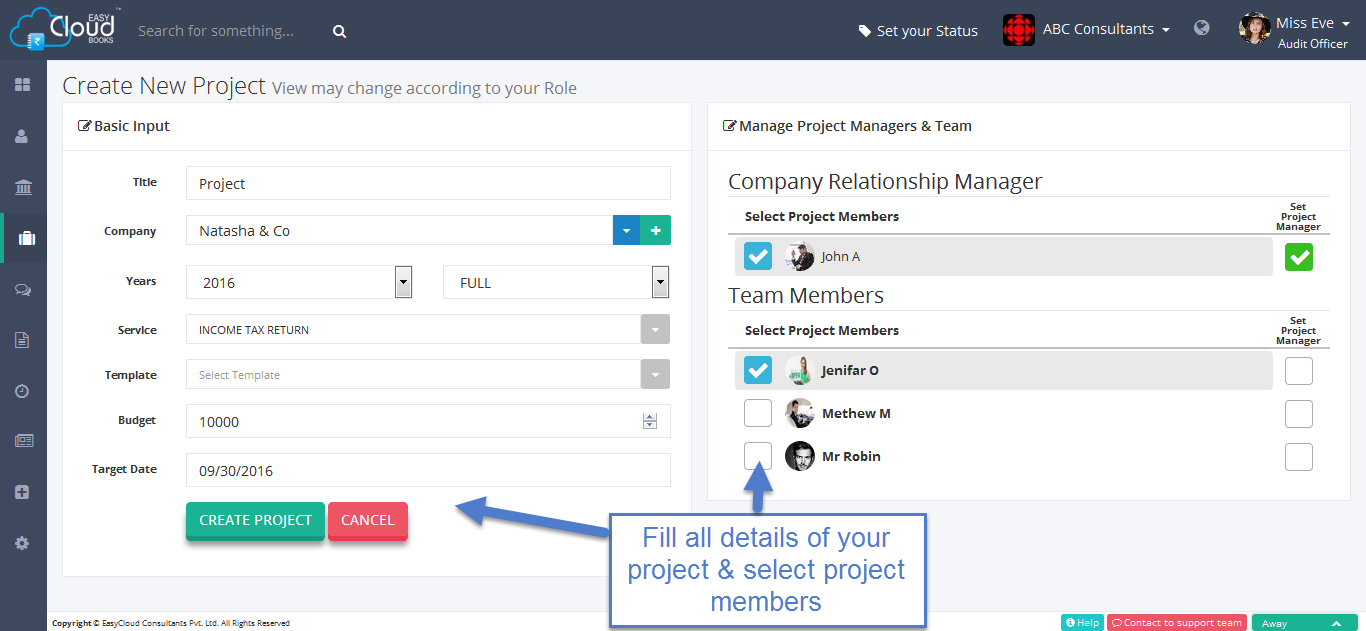
step 2: You will be redirected to a form, where in a few essential details are to be filled about the project to be created. Once you enter the information, click on CREATE PROJECT.
Each Project status represents a stage in a project's life. You can change project status that suit your practice's workflow. Examples of project status commonly used by practices are:-Pending,Lead,Not Started,In Progress,On Hold,Completed,Billed,Collected..
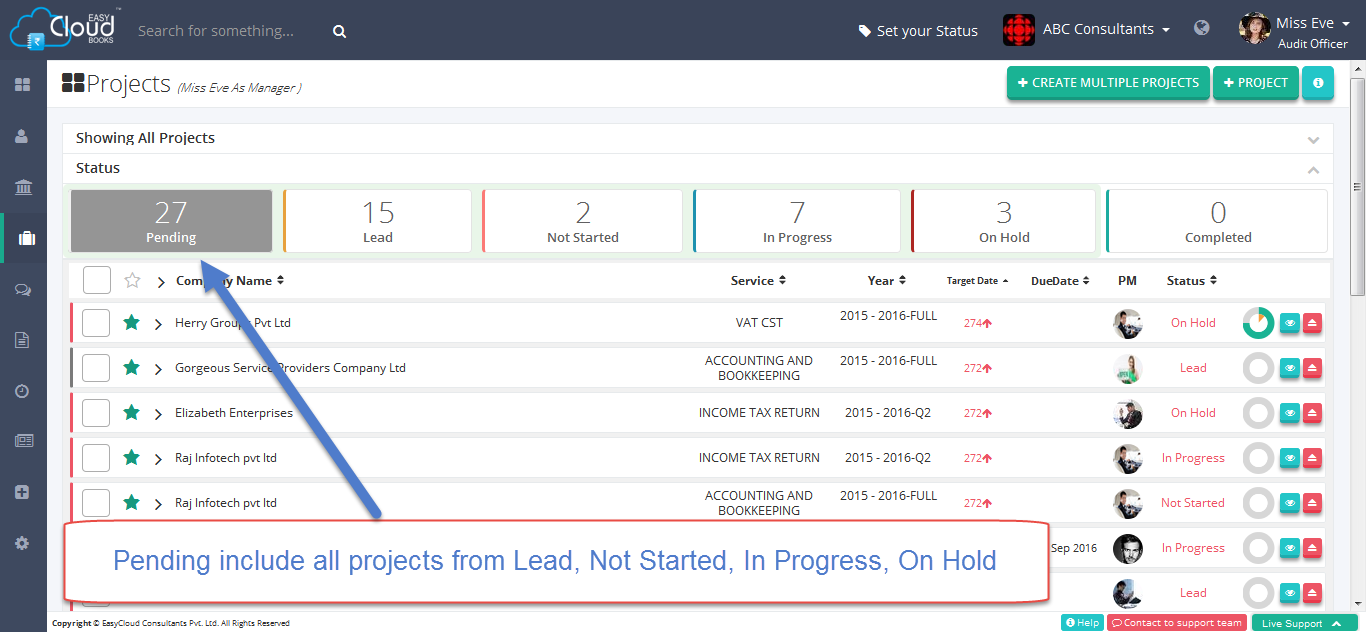
Pending :- Here you get the insight of all the Projects of your firm along with their current status such as Lead,Not Started,In Progress and On Hold.
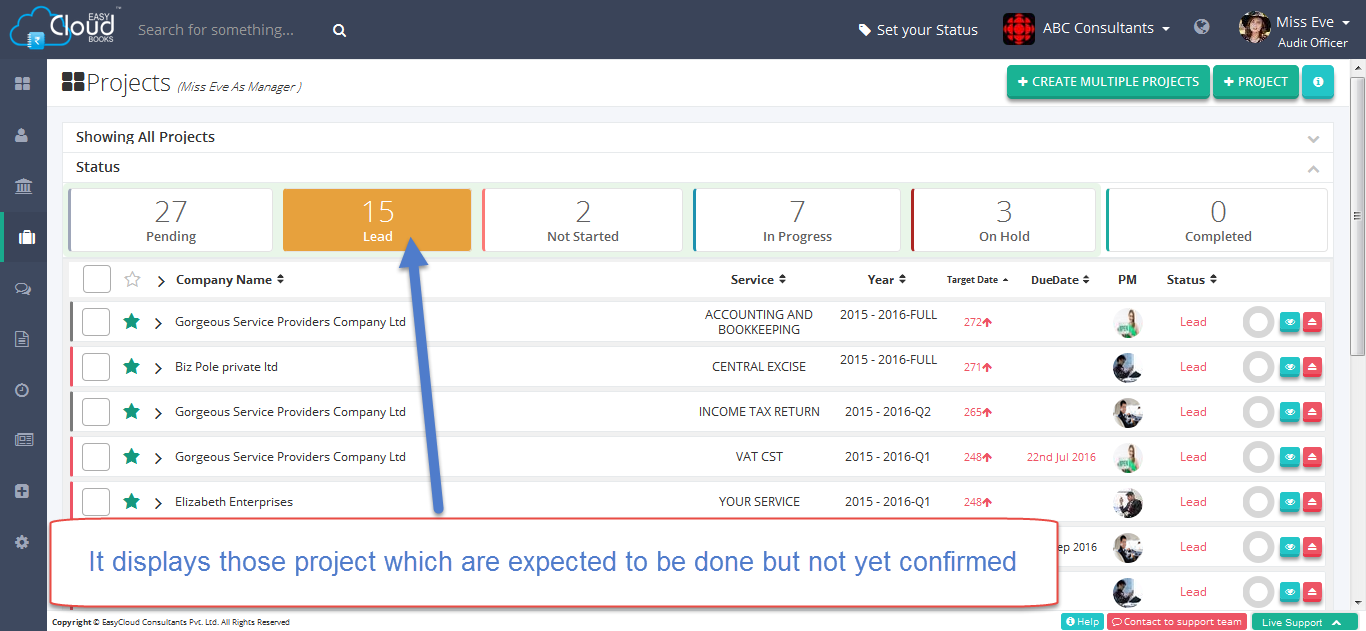
Lead :- It displays those project which are expected to be done but not yet confirmed.
for eg:-
-New client who has consulted but not assigned his work.
-Old client who are expected to come but still not turned up.
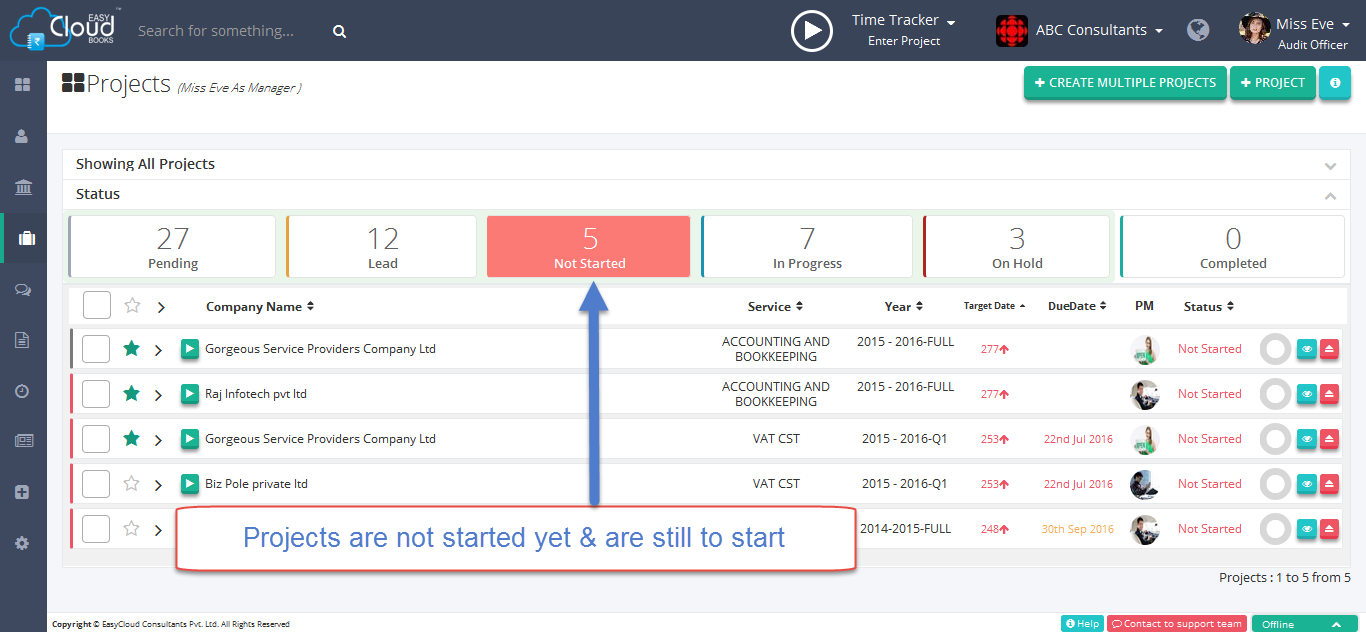
Not Started :- Projects in Not started lists out those projects that are still not started. It displays job to be done but yet not worked upon.
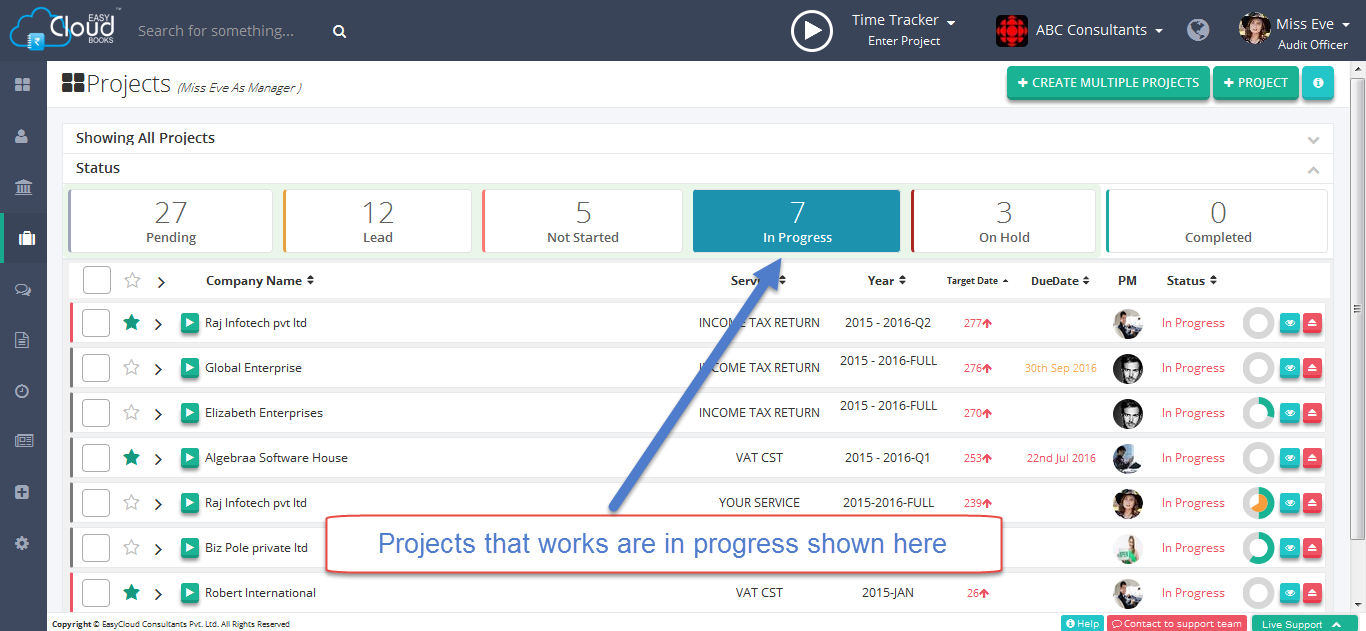
In Progress :- This column displays the actual work being currently carried out by your team along with details such as project manager, project description, start date, due date, billing amount, balance/advance,if any, and also the percentage of completion.
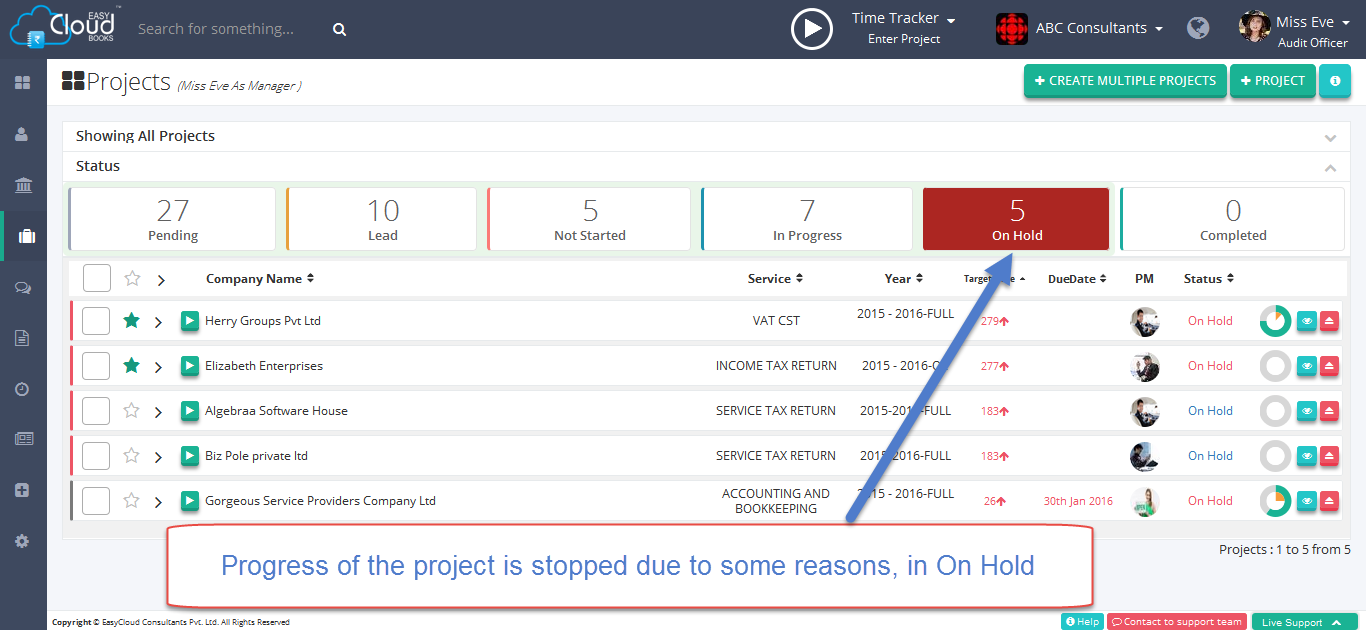
On Hold :- This column draws your attention towards those projects that have been started but not completed & are put to hold. It also displays the things/information that is pending and is responsible for its non-execution.

Completed :- This list displays all the projects that are successfully completed and ready for Review.
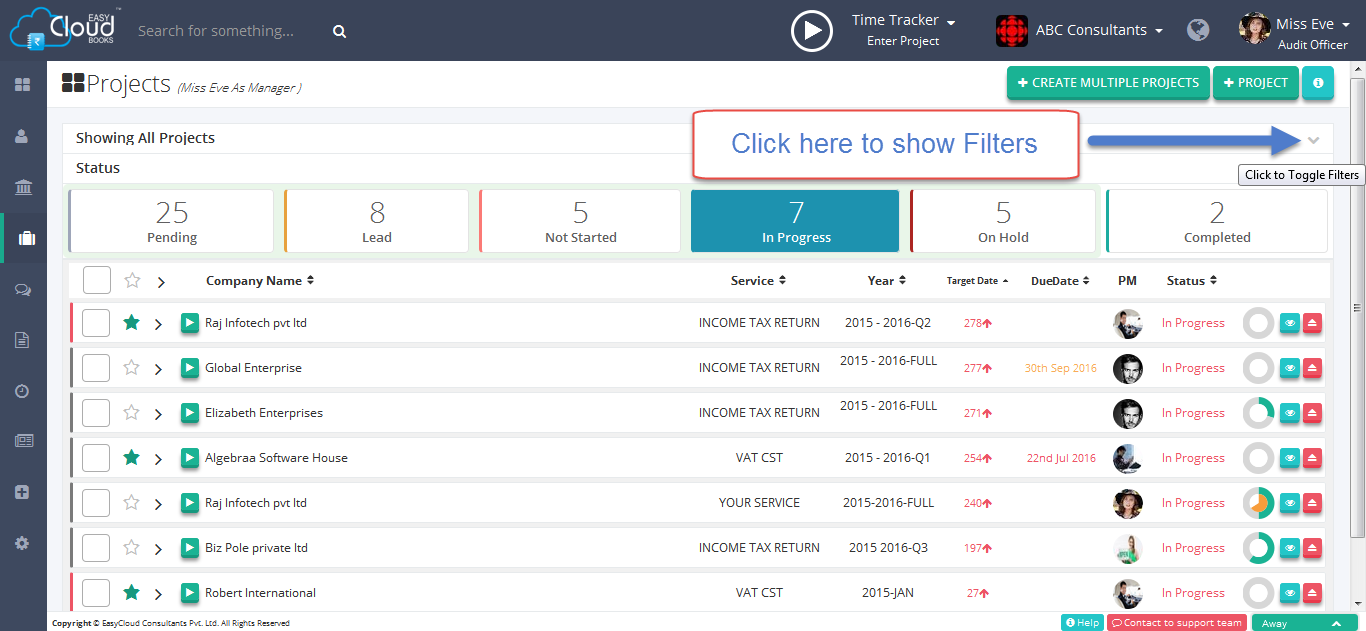
step 1: On the Project page click on toggle filter icon button.

step 2: Fill all field or only one according to your ease. Use custom filter, Company, Service, Year, Staff, Role search according to your project.

step 1: To expand project details click on the arrow before its company’s name on the project page.
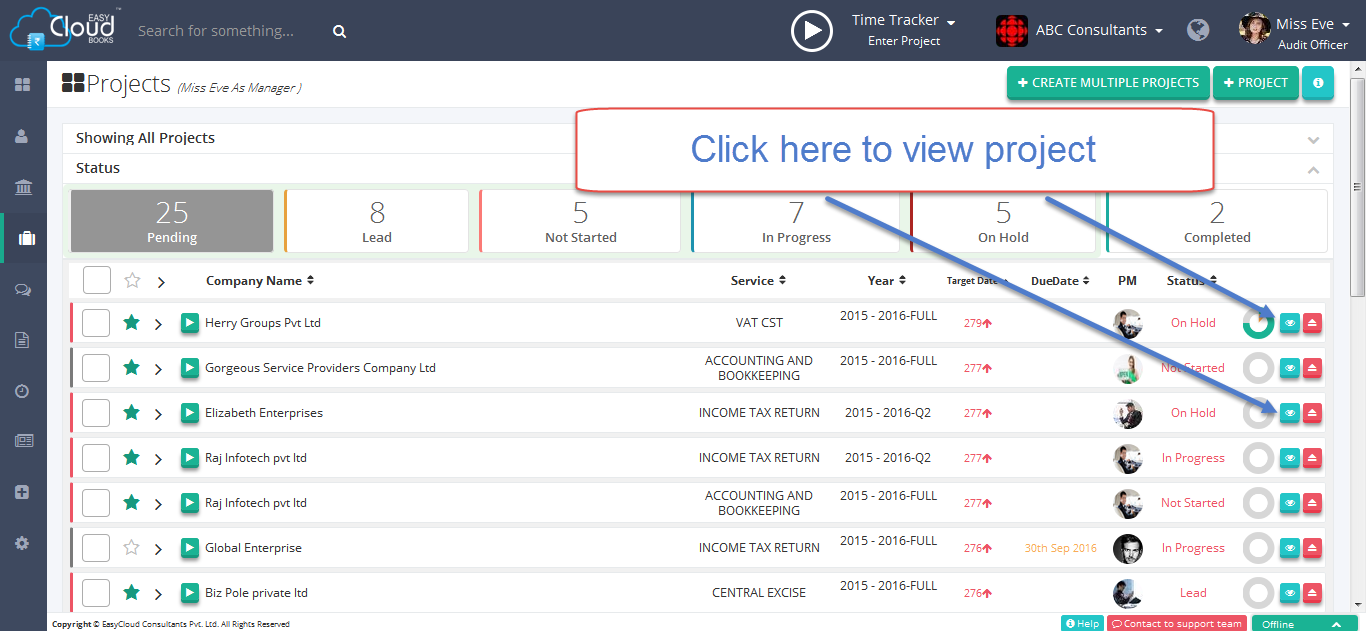
step 2: However to view full details of the project, click on the Blue button at the right.
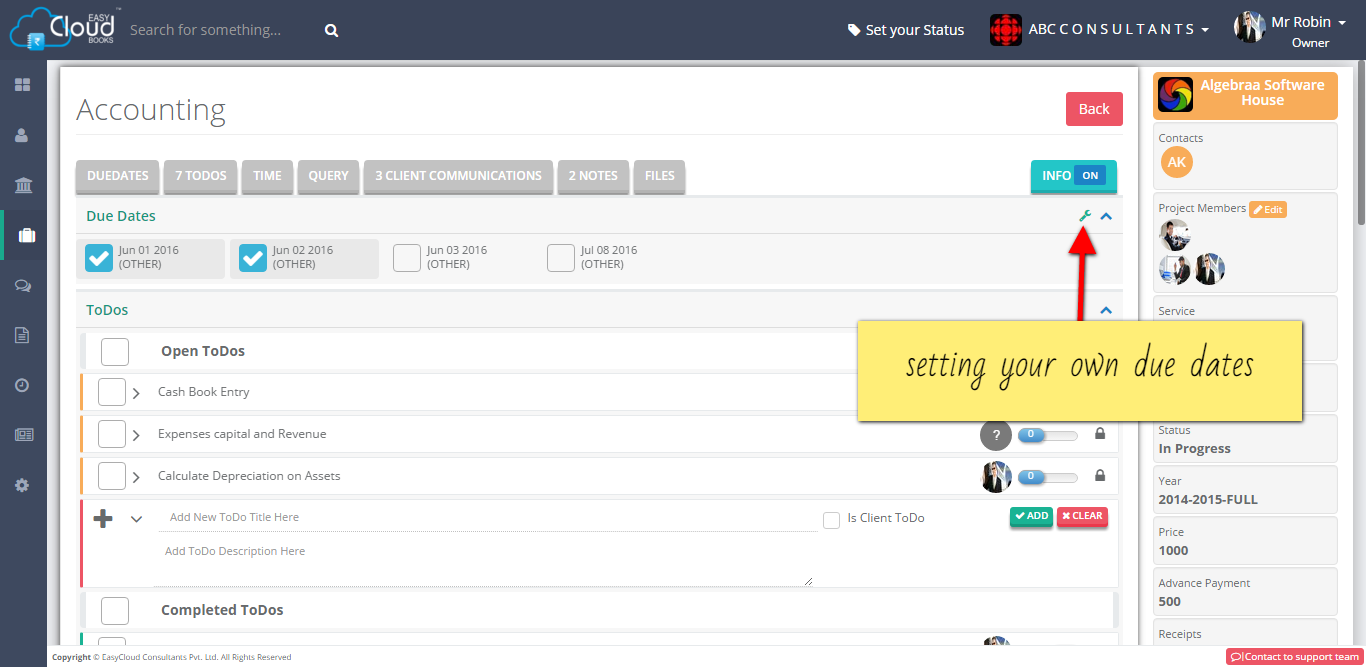
On the Project page click on the Icon to edit Due Dates.

Your ToDos list can be seen here and some actions to perform on ToDos like Prioritised, delete, edit and set not applicable. After your todo slider is set to 100 it will automatically shifted to completed todos.
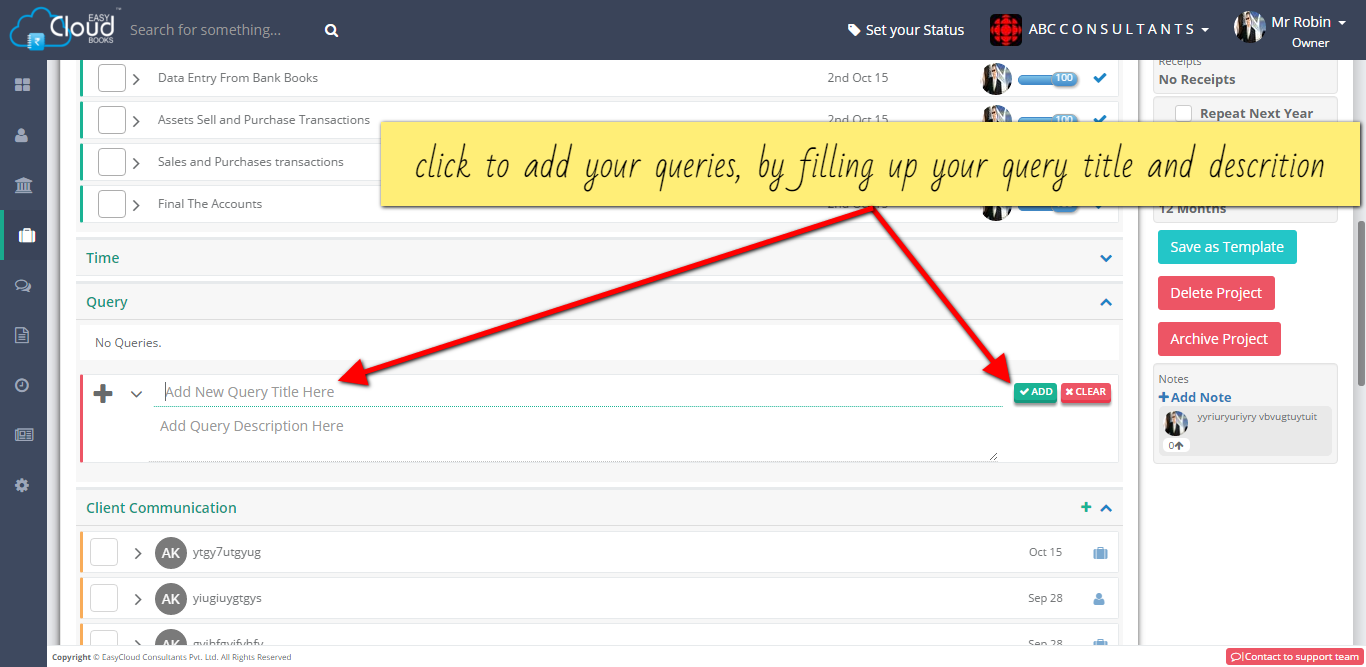
Click on ADD button to add your queries, by filling up your query title and discription.
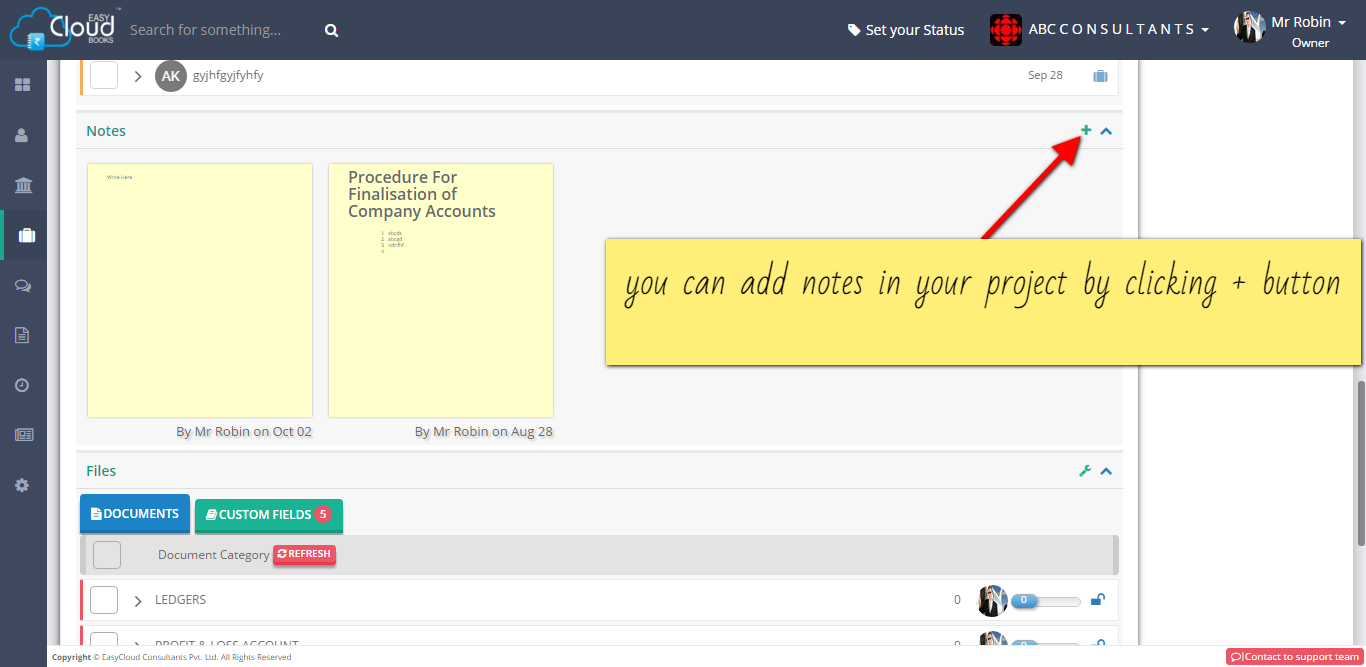
You can add Notes and also view it in project page.
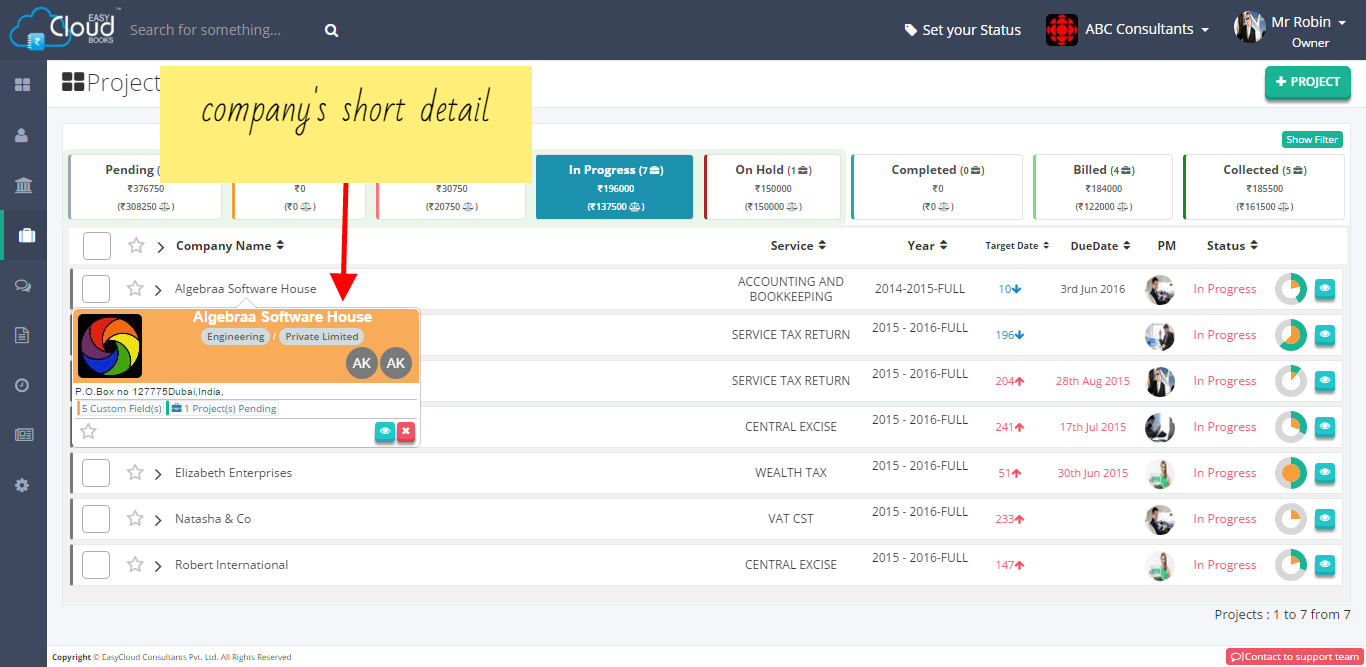
You can view Company Details here
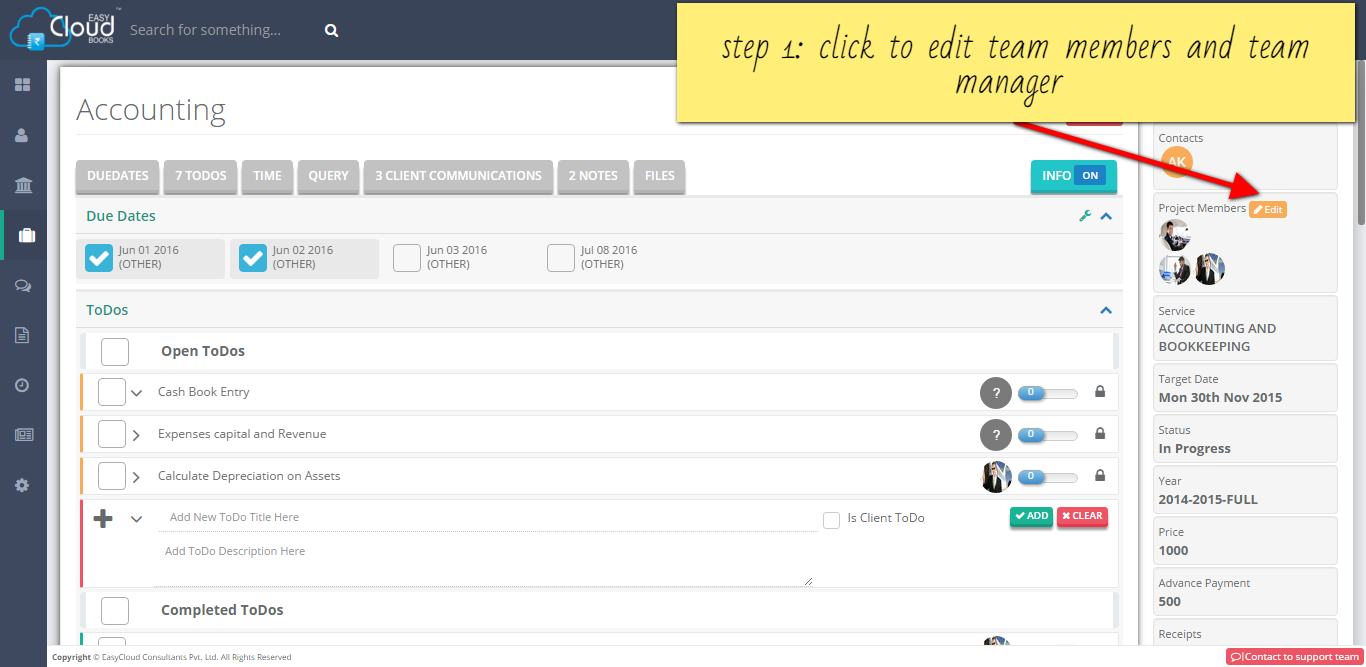
Project Members
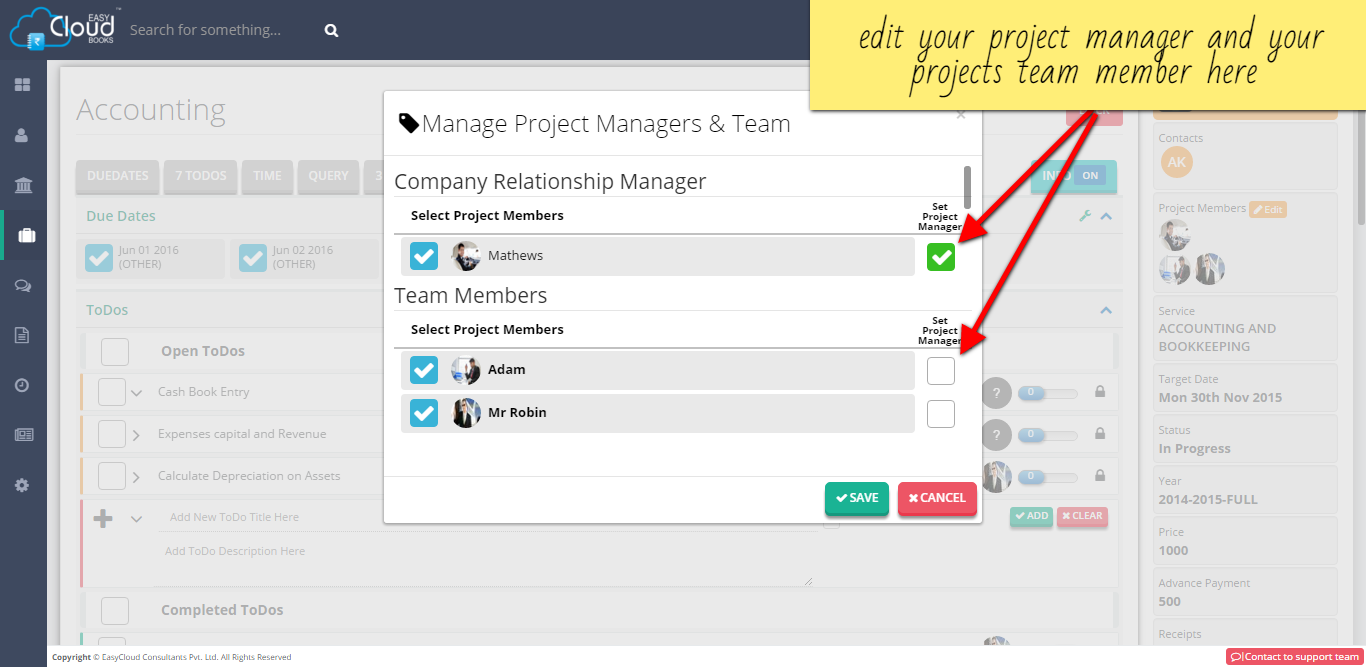
Edit Project Members
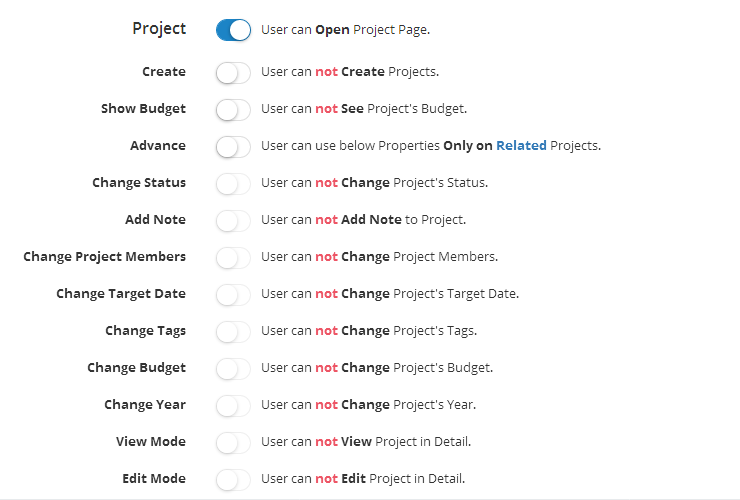
When project page is OFF on role page, then even if user is ASSOCIATED WITH PROJECTS (project member or project manager) he can not access projects at all. So you should turn off projects page carefully.

When project page is on, then by default users will be able to see ASSOCIATED PROJECTS (projects on which user is project manager or user). Further user will be able to view NOT ASSOCIATED PROJECTS, only if ADVANCE button is on.
That depends on whether user is associated with project or not.
- If user is associated with project as PROJECT MANAGER, then user have all rights related to project as default rights even if role page restricts it.
- If user is associated with project as PROJECT MEMBER (EXECUTIVE), then also default rights of executive apply and role page can just restrict visibility of price.
- If user is NOT ASSOCIATED with project then he can view those unassociated projects only if ADVANCE button is ON and will have NO DEFAULT rights and you can control his rights on those projects turning on / off functionalities below advance setting button.
You can give Advance feature to one or more staff to review projects and follow up project managers for speeding up. Usually this work belongs to owner of small practice unit but if your firm grows and owner want to delegate work of project review to other practice manager then he can give them advance access rights.
Further you can give right of project creation to one advance user who will be just creating projects and assigning team on it. In short you are given full customisation to suit your organisation style.
Note :- User who have been given Advance rights on projects will be able to see Manager filter to display projects on which user is not associated but has responsibility of reviewing and follow up.
This is because user may be advance user but he may not have been given view right for details inside project. You can give him this right under advance rights under projects inside role page.
When advance button is OFF on projects access, user will be able to see only those projects on which he is member or project manager. When advance button is ON, user will be able to see all projects.
Yes you can bookmark projects and filter the projects only to show bookmarked projects. This functionality you can use to keep reference of projects you are currently working on or to keep track of important projects for faster processing or to keep track of projects requiring discussion.
Yes you can change Tag, Status of multiple projects simultaneously selecting multiple projects and then changing the Tag or Status from top menu above the project list. Further you can also change the team of projects if all the selected multiple projects belongs to same service.
Time tracker will help your team to track their time on project with a click. To track time on project you need to just click play button besides project and it will start timer on top bar showing details of project on which time is getting tracked.
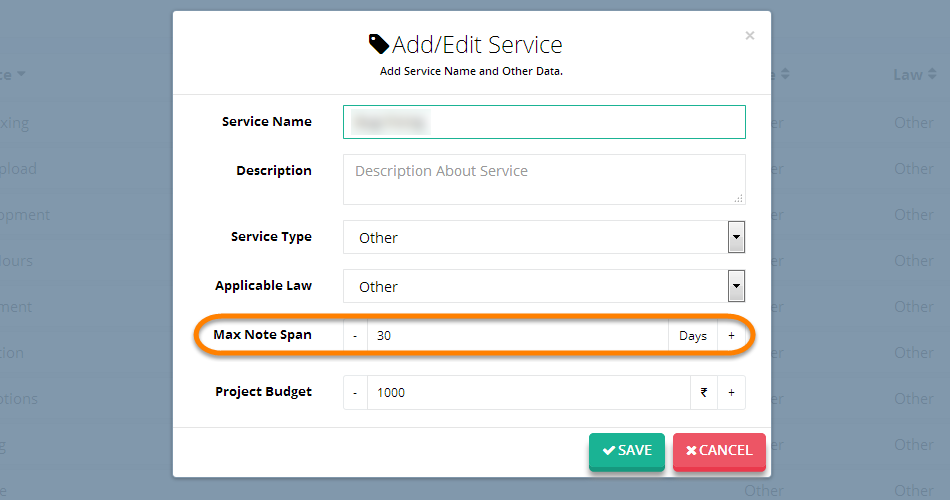
User can set next note date limit for projects in services module during create new service or edit existing service and change Max Note Span in days, its minimum value is 7 days.

User can set default project budget in services module during create new service or edit existing service and change project budget.
There are three ways to add tag on projects -
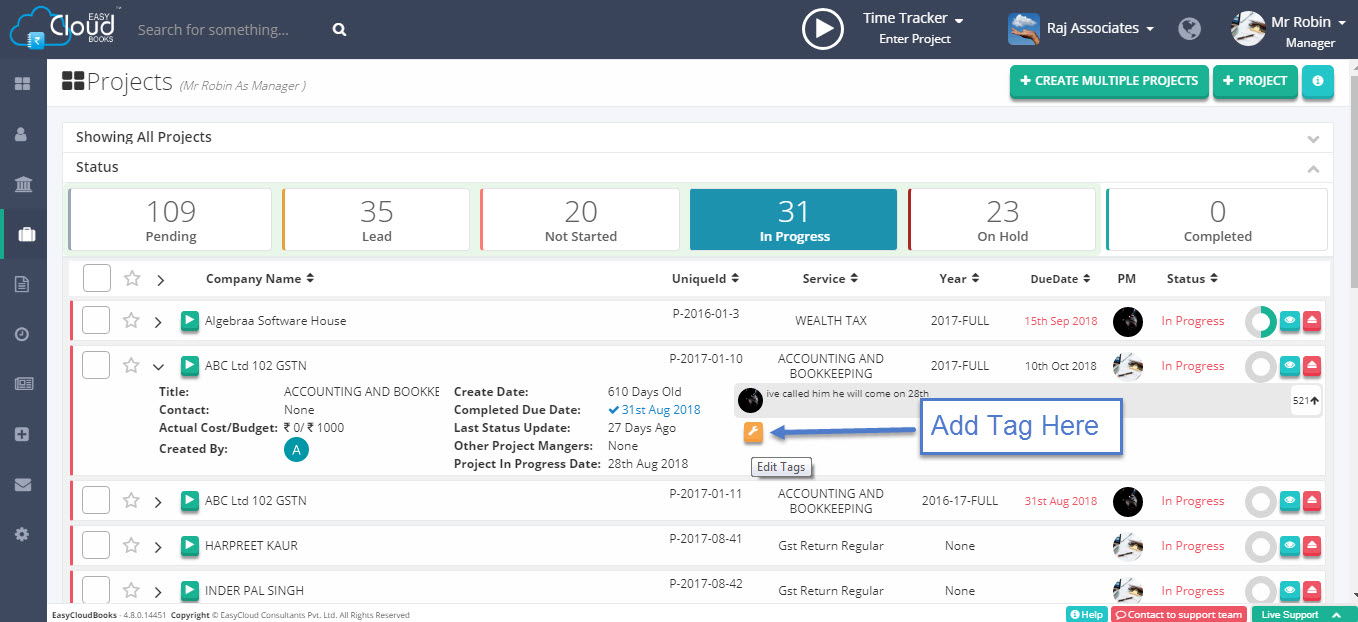
1. Expand any project, Edit Tags icon available there, click on it for add tag on projects.
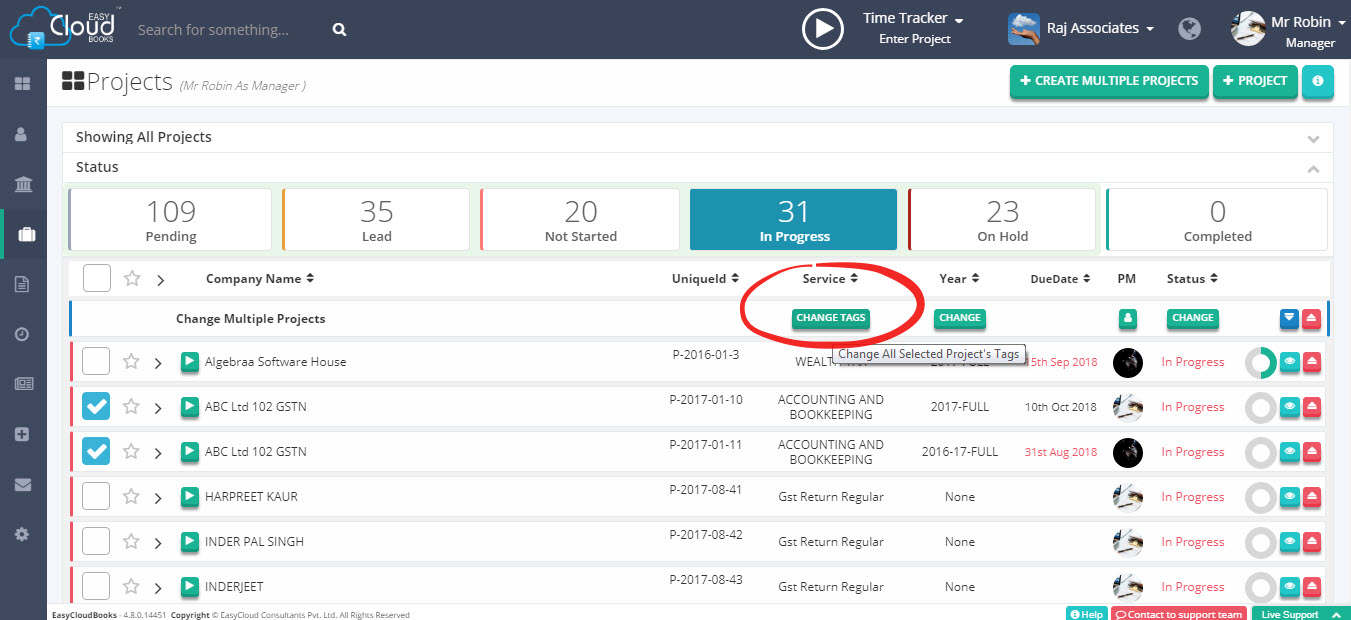
2. Select multiple projects, Change Tags button appear at above side, click on it for add multiple tag.

3. View any Project, in right side bar at bottom, Add Tag field is available. Write tag value there and click on +Add button.
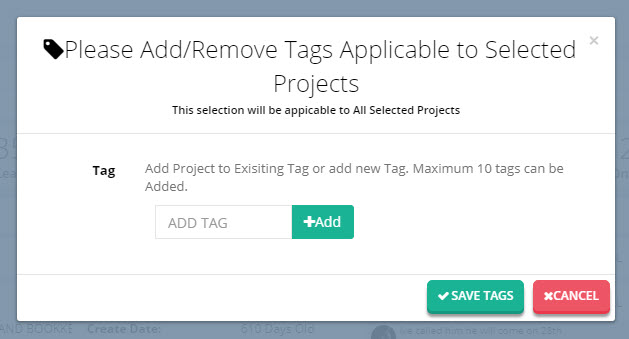
After click on Add Tag button, Popup box appear, here write tag and click on save tag button.
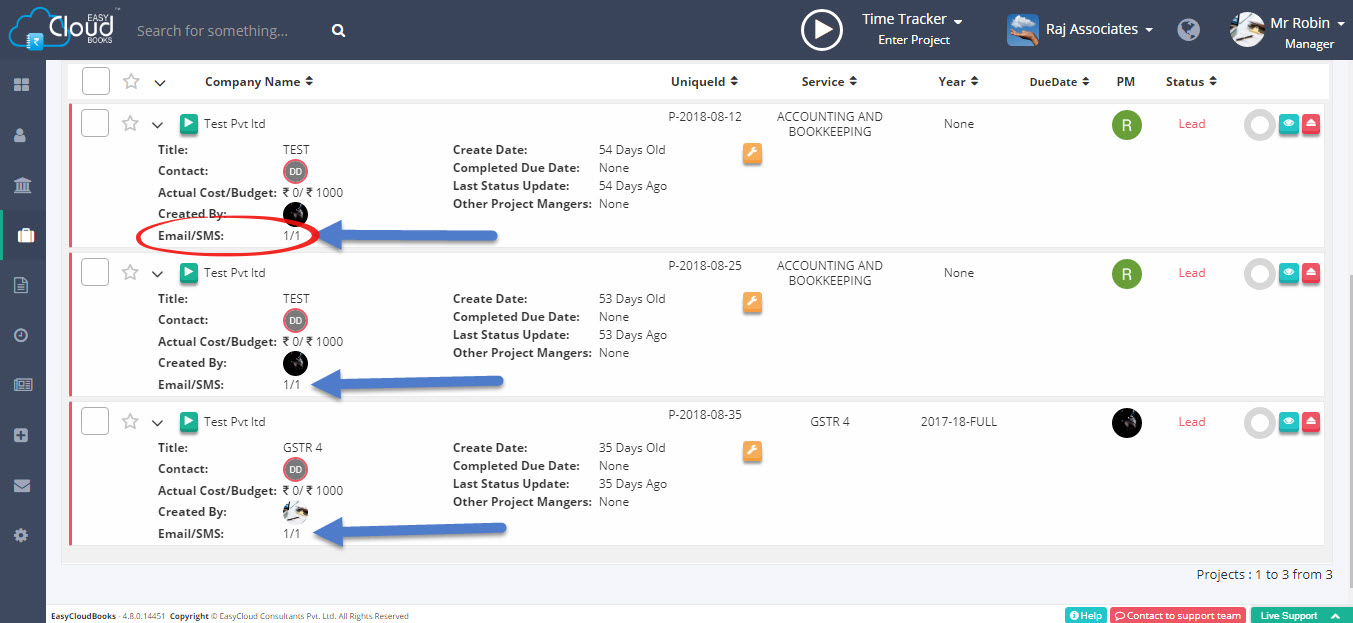
In project page , on expand view, Email/SMS count for last 3 months available. Please refer attached Image.
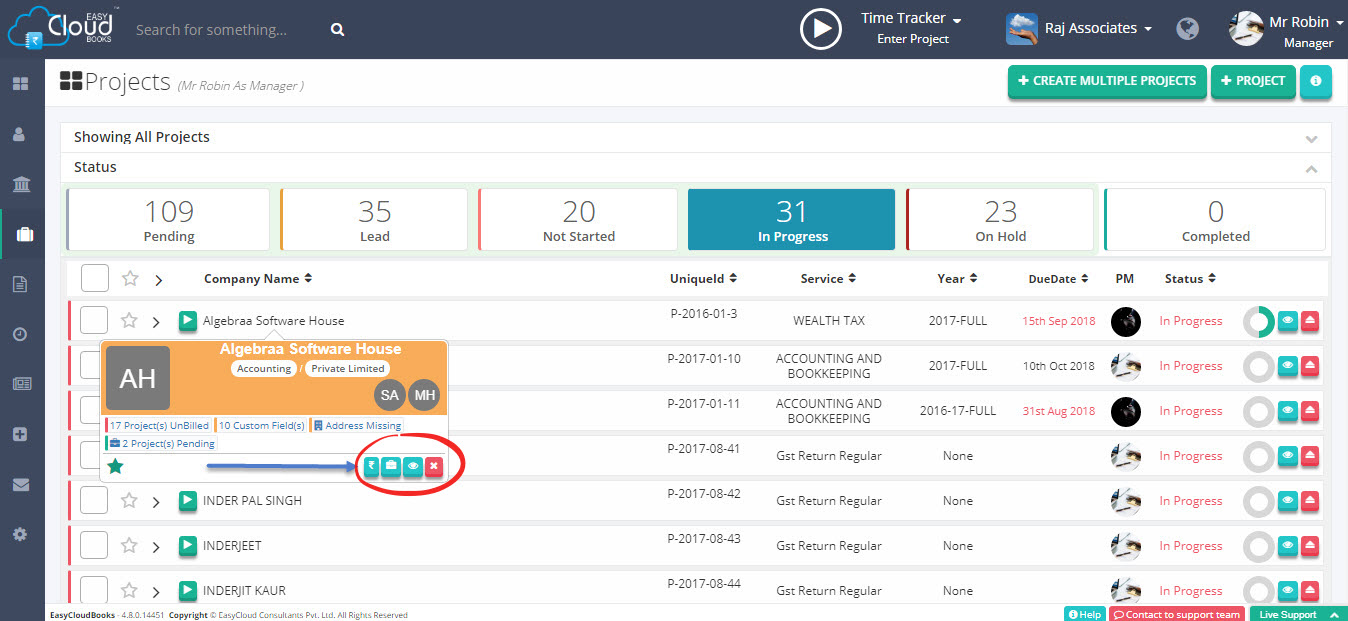
On mouse over of particular company, contact or project, Badge popup appear which contains lots of information.
Click on ₹ icon, it will directly open particular account details you want to see. Please refer attached image.